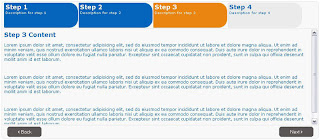
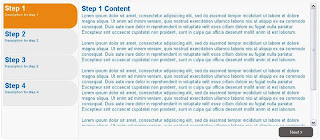
New version is available. Please check Smart Cart 2
Overview:Smart Cart is a flexible jQuery plugin for shopping cart. It gives an easy and clean interface for product selection section in a shopping cart.
Current Version: 0.95 beta
Screenshot:
Demo:
view demo
Download:
Version - 0.95 beta: download source from SourceForge
Features:
- Easy and Clean Interface for Shopping cart Product Selection.
- Automatic Calculation of Subtotal.
- Highlights the added items in cart list.
Step 1: Product List
The product list is set up in the following way
<div id="sc_productlist" class="scProductList">The items marked bold are important and follows its description:
<div class="scProductListItem">
<table border="0" cellpadding="2" cellspacing="2">
<tr>
<td rowspan="3"><img width="100px" src="images/product0.jpg" /></td>
<td><strong><span id="prod_name100">Apple IPhone 3G</span></strong></td>
</tr>
<tr>
<td><label>Price:</label> $<span id="prod_price100">1450.75</span></td>
</tr>
<tr>
<td><label>Quantity:</label>
<input name="prod_qty" class="scText" id="prod_qty100" value="1" size="3" type="text">
<input type="button" rel="100" class="scItemButton scBtn" value="Add Product"></td>
</tr>
</table>
</div>
</div>
Product Name: The product name for each product is taking from the span element with id = "<a prefix><product id>"
in this example"prod_name100", 100 is the product id and prod_name is the prefix.
Product Price: Same way as above the product price is taking from the span.
in this example "prod_price100", 100 is the product id and prod_price is the prefix.
Product Quantity: This time only difference is the selection from textbox instead of span element,
this is becouse product quantity is entered by the user in normal cases.
in the example the textbox with id = prod_qty100 is responsible for giving the quantity selected by the user,
here 100 is the product it and prod_qty is the prefix.
Add Product Button: This button is the trigger to add corresponding product to the cart. the css class name "scItemButton" and rel="100"
identifies the button as the trigger for the product 100.
See the demo code for the implimention example.
Step 2: Shopping Cart
<div id="sc_cart" class="scCart">Step 3: Include Files
<!-- Selected Product ID/Quantity are stored on the <select> element below -->
<select id="product_list" name="product_list[]" style="display:none;" multiple="multiple">
</select>
<!-- Cart List Header -->
<div class="scCartListHead">
<table width='100%'><tr>
<td> Product</td>
<td width='80px'>Quantity</td>
<td width='130px'>Amount ($)</td>
</tr></table>
</div>
<!-- Cart List: Selected Products are listed inside div below -->
<div id="sc_cartlist" class="scCartList"></div>
<div class="scCartListHead">
<table width='100%'><tr>
<td>
<!-- Message Label -->
<span id="sc_message"></span></td>
<td width='100px'>Subtotal ($):</td>
<td width='120px'>
<!-- Sub Total Label -->
<span id="sc_subtotal"></span>
</td>
</tr></table>
</div>
<br>
<!-- Checkout Button -->
<input style="width:200px;height:35px;float:right;" type="submit" class="scBtn" value="Checkout >>">
</div>
Include the following javascript and css files
<script type="text/javascript" src="js/jquery-1.3.2.min.js"></script>Step 4: Call the Smart Cart
<script type="text/javascript" src="js/jquery-ui-1.7.2.custom.min.js"></script>
<script type="text/javascript" src="js/jquery.scrollTo-min.js"></script>
<script type="text/javascript" src="js/SmartCart.js"></script>
<link rel="stylesheet" type="text/css" href="styles/style_smartcart.css" />
<script type="text/javascript">
$(document).ready(function() {
$("#sc_cart").smartCart();
});
</script>
Using the Options
<script type="text/javascript">
$(document).ready(function() {
$("#sc_cart").smartCart({
// Most Required Options - Element Selectors
itemSelector: '.scItemButton', // collection of buttons which add items to cart
cartListSelector: '#sc_cartlist', // element in which selected items are listed
subTotalSelector: '#sc_subtotal', // element in which subtotal shows
messageBox: '#sc_message', // element in which messages are displayed
// Prefix Item Attribute Selector - Required
itemNameSelectorPrefix: '#prod_name', // combination of this data and product/item id is used to get an element in product list with the item name (can be a div/span)
itemQuantitySelectorPrefix: '#prod_qty', // for quantity ( should be a textbox/<select>)
itemPriceSelectorPrefix: '#prod_price', // for price (can be a div/span)
// Text Labels
removeLabel: 'remove', // text for the "remove" link
addedLabel: '1 item added to cart', // text to show message when an item is added
removedLabel: '1 item removed from cart', // text to show message when an item is removed
emptyCartLabel: '<br><br> <b>Your Cart is Empty!</b> You can select items from the product list.', // text or empty cart (can be even html)
// Css Classes
selectClass: 'scProductSelect', // css class for the <select> element
listClass: 'scULList', // css class for the list ($ol)
listItemClass: 'scCartListItem', // css class for the <li> list items
listItemLabelClass: 'scListItemLabel', // css class for the label text that in list items
removeClass: 'scListItemRemove', // css class given to the "remove" link
highlightClass: 'scHighlight', // css class given to the highlight <span>
// Other Options
highlight: true // toggle highlight effect to the added item
});
});
</script>
Please give me your feedbacks


