This blog is outdated! Go to http://techlaboratory.net for latest updates

Smart Wizard 2.0 - flexible jQuery plug-in that gives wizard like interface


Overview

Smart Wizard is a flexible jQuery plug-in for wizard like interface. It allows to group contents into sections and so it saves page space and also gives a neat and stylish interface for users.
Using Smart Wizard 2.0 you can easily do input validation and so it is good for user registration and kind of tasks. Please see the demos and documentation for more details.

Versions

Latest Version : 2.0
Previous Version :0.98

Screenshots

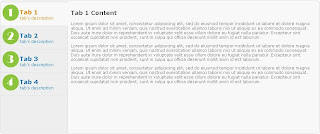
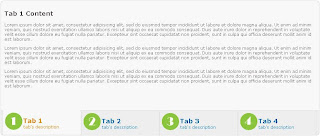
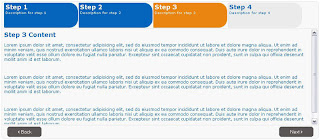
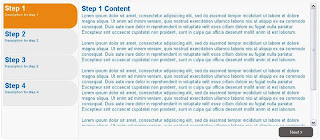
SmartWizard 2.0 - screens

Smart Wizard 0.98 - Basic Layout
Smart Wizard 2.0 - Basic Layout
Smart Wizard 0.98 - Vertical Layout
Smart Wizard 2.0 - Vertical
Smart Wizard 0.98 - Vertical Layout
Smart Wizard 2.0 - Validation

SmartWizard 0.98 - screens

Smart Wizard 0.98 - Basic Layout
Smart Wizard 0.98 - Vertical Layout


Demos

Smart Wizard 2.0 : Basic Example | Ajax Contents | Step Validation | Multiple Wizard | Vertical Style

Smart Wizard 0.98 : Basic Layout | Vertical Layout

Download

Smart Wizard 2.0 (SmartWizard-2.0.zip) : Download from SourceForge

Smart Wizard 0.98 (SmartWizard - 0.98.zip) : Download from SourceForge

Features (Smart Wizard 2.0)

  • Easy to implement, Minimal HTML required.
  • Ajax contents loading option.
  • Cool animation effects on step navigation. (none/fade/slide/slideleft)
  • Keyboard navigation option.
  • Horizontal and vertical style step anchors.
  • Easy step input validation option
  • Option to highlight error steps
  • In-built message box
  • Easy navigation with step anchors and navigation buttons
  • Can have multiple wizards on same page
  • Option to enable all steps on first load

License

Free to use and modify on both personal and commercial environment

Creative Commons License
Licensed under a Creative Commons Attribution-ShareAlike 3.0 Unported License.

Getting Started

Basic Usage:
$('#wizard').smartWizard();
Using with option parameters:
$('#wizard').smartWizard(
 {
  // Properties
    selected: 0,  // Selected Step, 0 = first step   
    keyNavigation: true, // Enable/Disable key navigation(left and right keys are used if enabled)
    enableAllSteps: false,  // Enable/Disable all steps on first load
    transitionEffect: 'fade', // Effect on navigation, none/fade/slide/slideleft
    contentURL:null, // specifying content url enables ajax content loading
    contentCache:true, // cache step contents, if false content is fetched always from ajax url
    cycleSteps: false, // cycle step navigation
    enableFinishButton: false, // makes finish button enabled always
    errorSteps:[],    // array of step numbers to highlighting as error steps
    labelNext:'Next', // label for Next button
    labelPrevious:'Previous', // label for Previous button
    labelFinish:'Finish',  // label for Finish button        
  // Events
    onLeaveStep: null, // triggers when leaving a step
    onShowStep: null,  // triggers when showing a step
    onFinish: null  // triggers when Finish button is clicked
 }
); 
Parameters and Events are describing on the table below

Installing Smart Wizard 2.0

Step 1: Include Files

Include the following JavaScript and css files on your page.

  1. jQuery Library file (Don't include if you already have it on your page)
  2. CSS(Style Sheet) file for Smart Wizard
  3. JavaScript plug-in file for Smart Wizard

To include the files copy and paste the below lines inside the head tag (<head> </head>) of your page.
Make sure the paths to the files are correct with your working environment.
<script type="text/javascript" src="jquery-1.4.2.min.js"></script>
<link href="smart_wizard.css" rel="stylesheet" type="text/css">
<script type="text/javascript" src="jquery.smartWizard-2.0.min.js"></script>

Step 2: The JavaScript

Inititialize the Smart Wizard, copy and paste the below lines inside the head tag (<head> </head>) of your page
<script type="text/javascript">
  $(document).ready(function() {
      // Initialize Smart Wizard
    $('#wizard').smartWizard();
  }); 
</script>

Step 3: The HTML

Finally the html, below shows the HTML markup for the Smart Wizard, You can customize it by including your on contents for each steps.
Copy and paste the below html inside the body tag (<body></body>) of your page.
<div id="wizard" class="swMain">
  <ul>
   <li><a href="#step-1">
          <label class="stepNumber">1</label>
          <span class="stepDesc">
             Step 1<br />
             <small>Step 1 description</small>
          </span>
      </a></li>
   <li><a href="#step-2">
          <label class="stepNumber">2</label>
          <span class="stepDesc">
             Step 2<br />
             <small>Step 2 description</small>
          </span>
      </a></li>
   <li><a href="#step-3">
          <label class="stepNumber">3</label>
          <span class="stepDesc">
             Step 3<br />
             <small>Step 3 description</small>
          </span>                   
       </a></li>
   <li><a href="#step-4">
          <label class="stepNumber">4</label>
          <span class="stepDesc">
             Step 4<br />
             <small>Step 4 description</small>
          </span>                   
      </a></li>
  </ul>
  <div id="step-1"> 
      <h2 class="StepTitle">Step 1 Content</h2>
       <!-- step content -->
  </div>
  <div id="step-2">
      <h2 class="StepTitle">Step 2 Content</h2> 
       <!-- step content -->
  </div>                      
  <div id="step-3">
      <h2 class="StepTitle">Step 3 Title</h2> 
       <!-- step content -->
  </div>
  <div id="step-4">
      <h2 class="StepTitle">Step 4 Title</h2> 
       <!-- step content -->                   
  </div>
</div>

More details & descriptions:

Load ajax content

To load the content via ajax call you need to specify the property "contentURL".
example:
<script type="text/javascript">
  $(document).ready(function() {
      // Initialize Smart Wizard with ajax content load
    $('#wizard').smartWizard({contentURL:'services/ajaxcontents.php'});
  }); 
</script>
When a step got focus the SmartWizard will post the step number to this contentURL and so you can write server side logic to format the content with the step number to be shown next. The response to this call should be the content of that step in HTML format.

To get the step number in php:
$step_number = $_REQUEST["step_number"]; 
By default the SmartWizard will fetch the step content only on the first focus of the step, and cache the content and use it on the further focus of that step. But you can turn off the content cache by specifying the property "contentCache" to false.
example:
<script type="text/javascript">
  $(document).ready(function() {
      // Initialize Smart Wizard with ajax content load and cache disabled
    $('#wizard').smartWizard({contentURL:'services/ajaxcontents.php',contentCache:false});
  }); 
</script>
Please see the ajax contents demo and following files on the source code to know how ajax content loading is implemented.
smartwizard2-ajax.htm
services/service.php

Input validation

Smart Wizard 2.0 does not have in-built form validation, but you can call you own validation function for each steps or for all steps with the events. Smart Wizard 2.0 has three events (onLeaveStep,onShowStep,onFinish). So you can write your step validation login in "onLeaveStep" event and on validation fail you can stay on that step by cancelling that event. Validation logic for all steps can be write on "onFinish" event and so you can avoid submitting the form with errors.
example:
<script type="text/javascript">
  $(document).ready(function(){
     // Smart Wizard      
    $('#wizard').smartWizard({onLeaveStep:leaveAStepCallback,
                                  onFinish:onFinishCallback});

      function leaveAStepCallback(obj){
        var step_num= obj.attr('rel'); // get the current step number
        return validateSteps(step_num); // return false to stay on step and true to continue navigation 
      }
      
      function onFinishCallback(){
       if(validateAllSteps()){
        $('form').submit();
       }
      }
      
      // Your Step validation logic
      function validateSteps(stepnumber){
        var isStepValid = true;
        // validate step 1
        if(stepnumber == 1){
          // Your step validation logic
          // set isStepValid = false if has errors
        }
        // ...      
      }
      function validateAllSteps(){
        var isStepValid = true;
        // all step validation logic     
        return isStepValid;
      }       
     
  });
</script>
Please see the step validation demo and following file on the source code to know how step input validation is implemented.
smartwizard2-validation.php

Highlight error steps

Highlighting error steps in Smart Wizard is easy
    $('#wizard').smartWizard('setError',{stepnum:3,iserror:true});
It takes two arguments
1. stepnum :- Step number to which is highlighted as error
2. iserror :- true = set the step as error step and false = remove the error highlighting

example:
<script type="text/javascript">
  $(document).ready(function() {
      // Initialize Smart Wizard
      $('#wizard').smartWizard();
        
      function setError(stepnumber){
        $('#wizard').smartWizard('setError',{stepnum:stepnumber,iserror:true});
      }
  }); 
</script>

Show message inside the wizard

An in-built message box is available with Smart Wizard 2.0 and you can call it as like below
    $('#wizard').smartWizard('showMessage','Hello! World');

example:
<script type="text/javascript">
  $(document).ready(function() {
      // Initialize Smart Wizard
      $('#wizard').smartWizard();
        
      function showWizardMessage(){
          var myMessage = 'Hello this is my message';
          // You can call this line wherever to show message inside the wizard
          $('#wizard').smartWizard('showMessage',myMessage);
      }
  }); 
</script>

Parameter Description:

Parameter Name Description Values Default Value
selected specify the selected step integer 0
keyNavigation enable/disable key navigation.
left/right keys are used if enabled
true = enabled
false= disabled
true
enableAllSteps Enable/Disable all steps on first load true = enabled
false= disabled
false
transitionEffect Animation effect on step navigation none/fade/slide/slideleft fade
contentURL Setting this property will enable ajax content loading, setting null will disable ajax contents null or a valid url null
contentCache This property will enable caching of the content on ajax content mode. So the contents are fetched from the url only on first load of the step true = enabled
false= disabled
true
cycleSteps This property allows to cycle the navigation of steps true = enabled
false= disabled
false
enableFinishButton This property will make the finish button enabled always true = enabled
false= disabled
false
errorSteps an array of step numbers to highlighting as error steps array of integers
ex: [2,4]
[]
labelNext Label for Next button String Next
labelPrevious Label for Previous button String Previous
labelFinish Label for Finish button String Finish


Event Description:

Event Name Description Parameters Default
onLeaveStep Triggers when leaving a step.

This is a decision making event, based on its function return value (true/false) the current step navigation can be cancelled.
Object: object of the step anchor element.

you can access the step number and step body element using this object
null
onShowStep Triggers when showing a step.

This is a decision making event, based on its function return value (true/false) the current step navigation can be cancelled.
Object: object of the step anchor element.

you can access the step number and step body element using this object
null
onFinish Triggers when the Finish button is clicked.
This is a decision making event, based on its function return value (true/false) the further actions can be cancelled.

ex: If the validation fails we can cancel form submitting and can show an error message, please see the form validation example for the implementation

If not set clicking finish button will submit the form in which the wizard is placed, and do nothing if a parent form is not found.
Object Array: an array of the object of all the step anchor elements null


Smart Cart 2 - javascript jQuery shopping cart plugin


Overview:

Smart Cart 2 is a flexible and feature rich jQuery plug-in for shopping cart. It makes the add-to-cart section of online shopping much easy and user friendly.
It is very easy to implement and only minimal HTML required. The selected items in the cart are accessible as an array of product/quantity pair delimited with ‘|’ on submit form or when checkout event is triggered. Smart Cart 2 have a simple and compact design with tabbed interface to saves space.
To avoid complexity I haven’t implemented built-in Ajax support, but using the events you can easily implement the Ajax features. The product list is more dynamic with built-in search and category filter. Template option gives you freedom to customize the product details display on product list and cart. It is also having option to show the product image and its expanded tool tip.

Version: 2.0

Screenshots:


Demo:
View Demo

Product Home:
http://www.techlaboratory.net

Download:
Smart Cart 2: Download from SourceForge

Features:
  • Easy to implement, minimal HTML required
  • Clean and compact design, tabbed design saves space
  • Product search and Category filter enables easy and fast access to the product what users are looking for
  • Automatically calculates subtotal and total
  • Quantity is editable from the cart list
  • Event support, custom Ajax feature and validation can easily implement using the events
  • Product Image display and expanded tool tip display
  • Can implement multiple cart on same page
  • Template option, for easily customizing product display details
  • Pre-populate products on cart on page load

Smart Cart 2 Documentation


Getting Started:

Basic Usage:
$('#SmartCart).smartCart();
With option parametrs:
$('# SmartCart). smartCart ({
   selected: 0,  // 0 = produts list, 1 = cart  
   resultName: 'products_selected[]', 
   enableImage: true,
   enableImageTooltip: true,
   enableSearch: true,
   enableCategoryFilter: true,
   productItemTemplate:'<strong><%=pname%></strong><br />Category: <%=pcategory%><br />
                        <small><%=pdesc%></small><br /><strong>

                        Price: <%=pprice%></strong>',
   cartItemTemplate:'<strong><%=pname%></strong>',

   // Events
   onAdd: null,      
   onAdded: null,    
   onRemove: null,   
   onRemoved: null,  
   onUpdate: null,   
   onUpdated: null,  
   onCheckout: null 
});
See Option Parameter Description
See Event Description


Installing Smart Cart 2:

Step 1: Get the latest version of jQuery (jQuery 1.3 or above)

Step 2: Download the Smart Cart 2 (http://www.techlaboratory.net or http://tech-laboratory.blogspot.com)

Step 3: Include following lines on the head section of your html file (Make sure the paths are correct).
<link href="styles/smart_cart.css" rel="stylesheet" type="text/css">
<script type="text/javascript" src="js/jquery-1.3.2.min.js"></script>
<script type="text/javascript" src="js/jquery.smartCart-2.0.js"></script>
Step 4: Copy the below javascript code to head section
<script type="text/javascript">
    $(document).ready(function(){  
     $('#SmartCart').smartCart();
    });
</script>
Step 5: Copy the below html to the body section.
<div id="SmartCart" class="scMain">
  <input type="hidden" pimage="products/product1.jpg" pprice="2299.99" pdesc="" 
    pcategory="Computers" pname="Apple MacBook Pro MA464LL/A 15.4" pid="100">

  <input type="hidden" pimage="products/product6.jpg" pprice="2699.99" pdesc="" 
    pcategory="Computers" pname="Sony VAIO 11.1&quot; Notebook PC" pid="101">
  <input type="hidden" pimage="products/product3.jpg" pprice="550.00" pdesc="" 
    pcategory="Cameras" pname="Canon Digital Rebel" pid="102">
</div>
Description:Text marked bold are the pseudo attributes that describes about the product. Like product name, price, description etc.

pid : Product ID
pname : Name of the product
pdesc : Description of the product
pprice : Price of the product
pimage : Product image source
pcategory : Category of the product

You can add more product details by adding new attributes to the input element, and so you can show them on product list or cart by editing the template.
You can customize the pseudo attribute names, and configure it on the plug-in file on the Attribute Settings section.

Finished: That's all, Browse the page you are set to go.


Some more details & descriptions:


1. How to show more product details on product list / How to customize Template?

<input type="hidden" pimage="products/product1.jpg" pprice="2299.99" pdesc="The Intel Core Duo." pcategory="Computers" pname="Apple MacBook Pro" pid="100"
product_sku ="SDK334455">

Here added a new pseudo attribute "product_sku".
Describes below is how to apply product list template, and the highlighted part will be replaced with the SKU of specified for corresponding product.

Specify your attribute by wrapping it with <%= and %> on the templates (productItemTemplate, cartItemTemplate) will be replaced with the value of the attribute on the product list or cart when displayed.
Example: <%=YOUR_ATTRIBUTE_NAME%>

  var productTemplateWithSKU = '<strong><%=pname%></strong><br />
          Category: <%=pcategory%><br /> 
      <small><%=pdesc%></small><br /><strong>Price: <%=pprice%></strong><br />

      <strong>SKU:  <%=product_sku%></strong>';
  // calling Smart cart
  $('#SmartCart').smartCart({productItemTemplate: productTemplateWithSKU });

2. How to enable category filter?

Category filter is an automatic option and you can enable or disable by specifying the Option parameter: enableCategoryFilter to true/false
Also the product category attribute should present the hidden element, if it is empty or null the category filter will be disabled. The category select box is filled automatically by reading the category attribute.

So to enable category filter you have to do only 2 things:
1. Enable it on option parameter enableCategoryFilter : true (true by default).
2. Specify category attribute in the hidden element.

<input type="hidden" pimage="products/product1.jpg" pprice="2299.99" 
 pdesc="The Intel Core Duo." pcategory="Computers" pname="Apple MacBook Pro" 
 pid="100">


Parameter Description:

Parameter Name Description Values Default Value
selected specify the selected tab 0 = product list
1= cart
0
resultName the name of the request to be passed when submitted
enableImage Enable/Disable Image display on product list and cart true = enabled
false= disabled
true
enableImageTooltip Enable/Disable Image tool tip display on product list and cart true = enabled
false= disabled
true
enableSearch Enable/Disable search for the products on product list true = enabled
false= disabled
true
enableCategoryFilter Enable/Disable category filter for the products on product list. Automatically disables if category attributes are not presents in the hidden elements true = enabled
false= disabled
true
productItemTemplate Template for the product display on product list String
(see details)
<strong><%=pname%></strong><br />
Category: <%=pcategory%><br />

<small><%=pdesc%></small><br />
<strong>Price: <%=pprice%></strong>
cartItemTemplate Template for the product display on cart String
(see details)
<strong><%=pname%></strong>


Event Description:

Event Name Description Parameters Default
onAdd Triggered immediately when click on add to cart button and just before staring add to cart process. This is a decision making event, based on its function return value (true/false) the product add to cart process can be canceled or continued. Object: object of the hidden element of the product to add.
Quantity: The quantity of the product to add.
null
onAdded Triggered when click on add to cart button but only after finish adding the product to cart. This event doesn’t accept return values. Object: object of the hidden element of the product added.
Quantity: The quantity of the product added.
null
onRemove Triggered immediately when a product is about to remove from cart, i.e. when click remove button on cart. This a decision making event, based on its function return value (true/false) the remove process can be canceled on continued. Object: object of the hidden element of the product to remove. null
onRemoved Triggered when the product remove (from cart) process is finished. This event doesn’t accept return values. Object: object of the hidden element of the product removed. null
onUpdate Triggered when a product quantity is updated by changing it from cart. This a decision making event, based on its function return value (true/false) the update process can be canceled on continued. Object: object of the hidden element of the product to update.
Quantity: The quantity of the product to update
null
onUpdated Triggered when product quantity is finished updating. This event doesn’t accept return values. Object: object of the hidden element of the product updated.
Quantity: The quantity of the product updated.
null
onCheckout Triggered when click on Checkout button on cart. If this even is not specified it will automatically submits the form element available. This event doesn’t accept return values. Object: an object of the select element which contains option elements with value as the pair of product_id and quantity delimited with pipe ‘|’ symbol. null

Smart Tab - a javascript jquery tab control plugin


Overview:

Smart Tab is a flexible jQuery(a JavaScript library) Tab Control plugin.

Current Version : 0.99

Screenshots:


Demo:

1. Basic Layout view demo
2. Vertical Layout view demo
2. Bottom Layout view demo

Download:

Version - 0.99(SmartTab - 0.99.zip) Download file from SourceForge

Features:
  • Customizable tab anchors, can use images.
  • AutoProgress:- option for automatic navigation of tabs.
  • AutoProgress can be stopped when mouse hover on control and restarts when not.
  • Keyboard Navigation:- Use left/right keyboard keys to navigate through tabs(try on demo).
  • Transition Effects:- option for fade/slide effects on tab transition.
  • Option for specifying the selected tab.
  • Easly can impliment Top, Bottom and Vertical style layout(see the demo).
  • Easy to implement, Minimal HTML required.
Getting Started:

Basic Usage:
$('#tabs').smartTab();
With option parametrs:
$('#tabs').smartTab({
      selected: 0,  // Selected Tab, 0 = first step   
      keyNavigation:true, // Enable/Disable key navigation
      autoProgress:false, // Auto navigate tabs on interval
      progressInterval: 3500, // Auto navigate Interval
      stopOnFocus:false, // Stops autoProgress on mouse hover and restarts when not
      transitionEffect:'none', // Effect on navigation, none/fade/slide
      tabContainerClass:'stContainer' // tab container css class name
});  
  
Installing Smart Tab:

Step 1: Get the latest version of jQuery(www.jquery.com)
Step 2: Download the Smart Tab (http://tech-laboratory.blogspot.com)
Step 3: Include following lines to head section of your html file (Make sure that the path to the files are correct).
<link href="styles/smart_tab.css" rel="stylesheet" type="text/css">
<script type="text/javascript" src="js/jquery-1.3.2.min.js"></script>
<script type="text/javascript" src="js/jquery.smartTab.js"></script>
Step 4: Copy the below lines to your head section
<script type="text/javascript">
   $(document).ready(function(){
      $('#tabs').smartTab();
   });
</script>
Step 5: Copy the below html to the body section.
<div id="tabs" class="stContainer">
    <ul>

      <li><a href="#tabs-1">
            <img class='logoImage2' border="0" width="50px" src="images/Step1.png">
            <h2>Tab 1<br />
            <small>Description</small></h2>

          </a></li>
      <li><a href="#tabs-2">
            <img class='logoImage2' border="0" width="50px" src="images/Step2.png">
            <h2>Tab 2<br />
            <small>Description</small></h2>

          </a></li>
      <li><a href="#tabs-3">
            <img class='logoImage2' border="0" width="50px" src="images/Step3.png">
            <h2>Tab 3<br />
            <small>Description</small></h2>

          </a></li>
      <li><a href="#tabs-4">
            <img class='logoImage2' border="0" width="50px" src="images/Step4.png">
            <h2>Tab 4<br />
            <small>Description</small></h2>

          </a></li>
    </ul>
    <div id="tabs-1">
        <h2>Tab 1 Title</h2> 
        <p>Tab 1 Content here</p>     
      </div>

    <div id="tabs-2">
        <h2>Tab 2 Title</h2> 
        <p>Tab 2 Content here</p>     
      </div>                      
    <div id="tabs-3">
        <h2>Tab 3 Title</h2> 
        <p>Tab 3 Content here</p>                        
      </div>

    <div id="tabs-4">
        <h2>Tab 4 Title</h2> 
        <p>Tab 4 Content here</p>
      </div>
</div>

Finished: That all, you are set to Go. I'm happy to hear comments and feedback from you. Happy Coding!!!

Smart Cart - JavaScript jQuery pluging for shopping cart


New version is available. Please check Smart Cart 2
Overview:
Smart Cart is a flexible jQuery plugin for shopping cart. It gives an easy and clean interface for product selection section in a shopping cart.
Current Version: 0.95 beta

Screenshot:


Demo:
view demo

Download:
Version - 0.95 beta: download source from SourceForge

Features:
  • Easy and Clean Interface for Shopping cart Product Selection.
  • Automatic Calculation of Subtotal.
  • Highlights the added items in cart list.
Installing Smart Cart 0.95 beta:
Step 1: Product List
The product list is set up in the following way
<div id="sc_productlist" class="scProductList">

<div class="scProductListItem">
<table border="0" cellpadding="2" cellspacing="2">
<tr>
<td rowspan="3"><img width="100px" src="images/product0.jpg" /></td>
<td><strong><span id="prod_name100">Apple IPhone 3G</span></strong></td>
</tr>
<tr>
<td><label>Price:</label> $<span id="prod_price100">1450.75</span></td>
</tr>
<tr>
<td><label>Quantity:</label>
<input name="prod_qty" class="scText" id="prod_qty100" value="1" size="3" type="text">
<input type="button" rel="100" class="scItemButton scBtn" value="Add Product"></td>
</tr>
</table>
</div>

</div>
The items marked bold are important and follows its description:
Product Name: The product name for each product is taking from the span element with id = "<a prefix><product id>"
in this example"prod_name100", 100 is the product id and prod_name is the prefix.

Product Price:
Same way as above the product price is taking from the span.
in this example "prod_price100", 100 is the product id and prod_price is the prefix.

Product Quantity: This time only difference is the selection from textbox instead of span element,
this is becouse product quantity is entered by the user in normal cases.
in the example the textbox with id = prod_qty100 is responsible for giving the quantity selected by the user,
here 100 is the product it and prod_qty is the prefix.

Add Product Button: This button is the trigger to add corresponding product to the cart. the css class name "scItemButton" and rel="100"
identifies the button as the trigger for the product 100.

See the demo code for the implimention example.
Step 2: Shopping Cart

<div id="sc_cart" class="scCart">
<!-- Selected Product ID/Quantity are stored on the <select> element below -->
<select id="product_list" name="product_list[]" style="display:none;" multiple="multiple">
</select>
<!-- Cart List Header -->
<div class="scCartListHead">
<table width='100%'><tr>
<td>&nbsp;&nbsp;Product</td>
<td width='80px'>Quantity</td>
<td width='130px'>Amount ($)</td>
</tr></table>
</div>
<!-- Cart List: Selected Products are listed inside div below -->
<div id="sc_cartlist" class="scCartList"></div>

<div class="scCartListHead">
<table width='100%'><tr>
<td>
<!-- Message Label -->
<span id="sc_message"></span></td>
<td width='100px'>Subtotal ($):</td>
<td width='120px'>
<!-- Sub Total Label -->
<span id="sc_subtotal"></span>
</td>
</tr></table>
</div>
<br>
<!-- Checkout Button -->
<input style="width:200px;height:35px;float:right;" type="submit" class="scBtn" value="Checkout >>">
</div>
Step 3: Include Files
Include the following javascript and css files
<script type="text/javascript" src="js/jquery-1.3.2.min.js"></script>
<script type="text/javascript" src="js/jquery-ui-1.7.2.custom.min.js"></script>
<script type="text/javascript" src="js/jquery.scrollTo-min.js"></script>
<script type="text/javascript" src="js/SmartCart.js"></script>
<link rel="stylesheet" type="text/css" href="styles/style_smartcart.css" />
Step 4: Call the Smart Cart
<script type="text/javascript">
$(document).ready(function() {
$("#sc_cart").smartCart();
});
</script>

Using the Options
<script type="text/javascript">
$(document).ready(function() {
$("#sc_cart").smartCart({
// Most Required Options - Element Selectors
itemSelector: '.scItemButton', // collection of buttons which add items to cart
cartListSelector: '#sc_cartlist', // element in which selected items are listed
subTotalSelector: '#sc_subtotal', // element in which subtotal shows
messageBox: '#sc_message', // element in which messages are displayed
// Prefix Item Attribute Selector - Required
itemNameSelectorPrefix: '#prod_name', // combination of this data and product/item id is used to get an element in product list with the item name (can be a div/span)
itemQuantitySelectorPrefix: '#prod_qty', // for quantity ( should be a textbox/<select>)
itemPriceSelectorPrefix: '#prod_price', // for price (can be a div/span)
// Text Labels
removeLabel: 'remove', // text for the "remove" link
addedLabel: '1 item added to cart', // text to show message when an item is added
removedLabel: '1 item removed from cart', // text to show message when an item is removed
emptyCartLabel: '<br><br>&nbsp;&nbsp;&nbsp;&nbsp;&nbsp;<b>Your Cart is Empty!</b> You can select items from the product list.', // text or empty cart (can be even html)
// Css Classes
selectClass: 'scProductSelect', // css class for the <select> element
listClass: 'scULList', // css class for the list ($ol)
listItemClass: 'scCartListItem', // css class for the <li> list items
listItemLabelClass: 'scListItemLabel', // css class for the label text that in list items
removeClass: 'scListItemRemove', // css class given to the "remove" link
highlightClass: 'scHighlight', // css class given to the highlight <span>
// Other Options
highlight: true // toggle highlight effect to the added item
});
});
</script>

Please give me your feedbacks

Smart Wizard - a javascript, jQuery wizard control plugin


Overview:

Smart Wizard is a flexible jQuery(a JavaScript library) plugin that gives wizard like interface. Wizards are generally used to give step by step contents into users, it gives better and clean user interface and saves space. An example of wizard can see when we install a software in our windows machine. Some websites also uses this approach on their user registration or etc.

I was looking for a good wizard control for my web project and I don’t find a good control that suits my need. So I decided to develop it myself.

Current Version : 0.98


Screenshots:


Demo:


1. Basic Wizard view demo

2. Vertical Style Wizard view demo


Home Page:

Visit Home

jQuery Plugin Page:

See this on jQuery Plugin page

Download:

Version - 0.98 download file from SourceForge

Features:

  • Easy to implement, Minimal HTML required.

  • Easy Navigation – Step titles are act as anchors.

  • Validation for each step.

  • Option for specifying first selected step.

  • Option for making all steps enabled.

  • Both Vertical and Horizontal Navigation.


Getting Started:

Basic Usage:

$('#smartwizard').smartWizard();

Using with option parametrs:
$('#smartwizard').smartWizard(
{
selectedStep: 0,  // Selected Step, 0 = first step
errorSteps:[],    // Array Steps with errors
enableAll:false,  // Enable All Steps, true/false
animation:true,   // Animation Effect on navigation, true/false    
validatorFunc:validateTabs // Step validation function, Step index will be passed
}
); 

Installing Smart Wizard:

Step 1: Get the latest version of jQuery(www.jquery.com)

Step 2: Download the Smart Wizard (http://tech-laboratory.blogspot.com)

Step 3: Include following lines to head section of your html file. Make sure that the path to the files are correct.
<link href="style_wizard.css" rel="stylesheet" type="text/css">
<script type="text/javascript" src="jquery-1.3.2.min.js"></script>
<script type="text/javascript" src="SmartWizard.js"></script>


Step 4: also copy the below lines to your head section
<script type="text/javascript">
$().ready(function() {
   $('#smartwizard').smartWizard();
});
</script>

Step 5: Copy the below html to your file’s body section and open the file on browser. That’s all!
<div id="smartwizard" class="wiz-container">
<ul id="wizard-anchor">
<li><a href="#wizard-1"><h2>Step 1</h2>
     <small>Description for step 1</small></a></li>
<li><a href="#wizard-2"><h2>Step 2</h2>
     <small>Description for step 2</small></a></li>
<li><a href="#wizard-3"><h2>Step 3</h2>
     <small>Description for step 3</small></a></li>
</ul>
<div id="wizard-body" class="wiz-body">
<div id="wizard-1" >
   <div class="wiz-content">
           Content for Step 1
       </div>   
       <div class="wiz-nav">
         <input class="next btn" id="next" type="button" value="Next >" />
       </div>     
   </div>
<div id="wizard-2">
   <div class="wiz-content">
           Content for Step 2
       </div>
       <div class="wiz-nav">
         <input class="back btn" id="back" type="button" value="< Back" />
         <input class="next btn" id="next" type="button" value="Next >" />
       </div>                   
   </div>
<div id="wizard-3">
   <div class="wiz-content">
       Content for Step 3
       </div>      
       <div class="wiz-nav">
         <input class="back btn" id="back" type="button" value="< Back" />
         <input class="btn" id="next" type="button" value="Done" />
       </div>        
   </div>
   </div>
   </div>